In honour of 90th birthday, the only way to celebrate is with a classic British cake : the Victoria sponge. Named after Queen Victoria, it encapsulates at its finest and its simplest.
Perfect for an afternoon tea treat or gracing a table at birthday parties, the Victoria sponge will always be a crowd favourite. Mary describes the bake as the "most healing of cakes to make", whatever that means. I haven't made a Victoria sponge in years, a distant memory in my baking experience.
As a relatively-experienced home baker, it doesn't always excite me as much as a more convoluted recipe. Give me a 20-step recipe any day of the year.
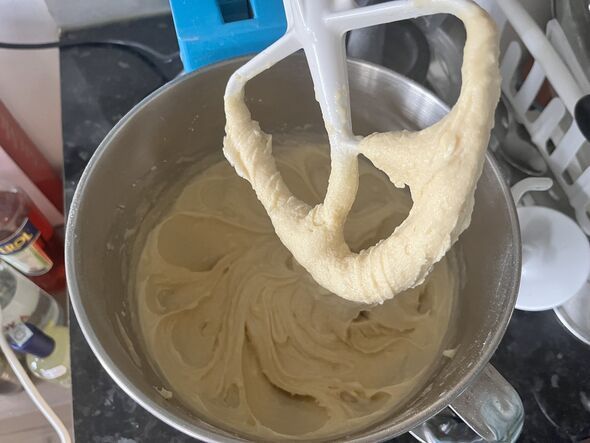
But it's Mary's birthday, it's only right to go back to basics. You only need five staple ingredients for the sponge, and with the all-in-one method, the recipe couldn't be simpler.
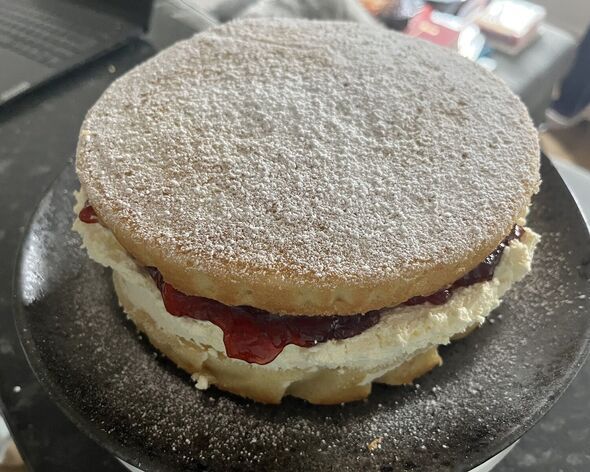
Essentially all you need is three main components; the sponge, jam, and whipped cream.
Primed for bakers of any skill and experience, you really don't need to think that hard. So if you've never baked a cake before and you're not entirely sure where to start, Mary's got you covered.
However, you don't want to take your eye off the ball. Beat the batter too much and you'll knock all of the air out.
Once all of the ingredients have been added to the bowl, the batter is virtually done. Although I used a stand-mixer, this batter can easily be done with a hand-held electric whisk - or if you're going seriously old school, a hand whisk. However, this will require some elbow grease.
The batter prep is completed in minutes, all ready to be thrown into the oven. Mary's recipe uses a baking spread, but she notes you can use soft butter, which I did. This is just personal preference, but Mary stands by baking spread as it gives a lighter texture.
She also tops her sponges with caster sugar, but personally, I prefer using icing sugar for a sleeker appearance and less grainy texture.
Depending on how well you know your oven's power, the sponge can be baked for between 22 and 25 minutes. However, I did notice that even after the allotted baking time, my sponges came out slightly paler than those in Mary's pictures, but they weren't underbaked. Again, this could be dependent on the heat of my oven.
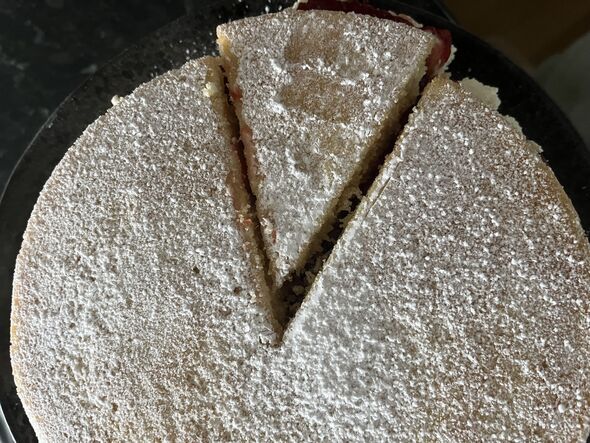
Another difference I noticed was the discrepancy between the height of my sponges and Mary's. While Mary's had a thicker sponge, mine baked slighter flatter.
The recipe notes for an eight-inch tin, but I think you could get away with a smaller tin for a higher, thicker sponge. So don't feel disheartened if the sponge is flatter than expected. After all, it is a sandwich cake.
While the preparation and cooking time can be done and dusted within half an hour, the longest dawdling time is waiting for the sponges to cool. Construct the cake while the sponges are hot and you run the risk of the whipped cream dribbling away. No one wants a soggy sponge.
Now I don't eat cake and haven't for nearly 20 years, but the process is therapeutic. You could even bake Mary's recipe with your eyes closed, it's that simple to follow.
After each sponge is smothered in the jam and cream, the most satisfying part is cutting in. My knife glides through the cake like butter. Airy, golden, and packed full of sweetness.
As a baker, you couldn't ask for an easier recipe. Is it my favourite? Probably not. I enjoy a challenge. But for anyone starting out or teaching their children, you can't go wrong with Mary Berry's Victoria sponge.
 Mary Berry's Victoria Sponge Sandwich
Ingredients
Sponge
- 225g (8oz) baking spread, straight from the fridge, plus extra for greasing
- 225g (8oz) caster sugar
- 4 eggs
- 225g (8oz) self-raising flour
- 1 level tsp baking powder
Filling & Topping
- ½ × 370g jar strawberry jam
- 300ml (½ pint) pouring double cream, whipped
- A little caster sugar or icing sugar, to sprinkle
Method
Preheat the oven to 180°C/160°C fan/Gas 4. Lightly grease two 20cm (8in) deep loose-bottomed sandwich tins and line the bases with non-stick baking paper.
Measure the sponge ingredients into a large bowl or freestanding mixer and beat for about two minutes with an electric whisk until beautifully smooth and lighter in colour. The time will vary according to the efficiency of the mixer.
Divide the mixture between the tins and level the tops. Bake in the oven for about 25 minutes, or until well risen and golden and the cakes are shrinking away from the sides of the tins. The tops of the cakes should spring back when pressed lightly with a finger.
Leave the cakes to cool in the tins for a few moments, then run a palette knife around the edge of the tins to free the sides. Turn the cakes out, then peel off the paper and leave to cool completely on a wire rack.
Choose the cake with the best top and spread the underside with jam. Put the other cake top downwards on a serving plate. Spread this cake carefully with the whipped cream. Sit the other cake on top (jam side touching the cream).
Sprinkle the cake with sugar and cut into slices to serve.